Maybe playing volleyball may turn out not to be as straightforward as it seems. But hey, drawing a simple or cartoon volleyball is not hard to master. This ArtHearty article shows you how to draw a volleyball, in easy steps!
A Little History!
Volleyball was invented in 1895 by William G. Morgan. It was initially called Mintonette.
If you are beginner at drawing, it is best that you start with the basics. Sometimes, even the simplest things can take some time when drawing. Consider a volleyball; it looks so simple, doesn’t it? But when you actually start drawing, it may not be so easy. No worries, when you go through the easy steps we have provided here, it’ll be super-easy.
First, it is important to understand how a volleyball looks. It is round in shape, obviously, and has eighteen rectangular sections. Most volleyballs are white or colored in 2 – 3 different colors at the most.
Here, we give you step-by-step instructions to draw three different types of volleyballs. Once you get the hang of the basic steps, you’ll be able to experiment or customize the designs according to your wish. So let’s start drawing!
Simple Volleyball

Step 1: The first step is very simple. Just draw a nice round circle.

Step 2: Now, draw four dots as shown above.

Step 3: Connect the dots, and you’ll get a rectangular section.

Step 4: Join the dots to the circle to make sections.

Step 5: Draw two lines in each section, as shown in the image.

And your volleyball is ready.
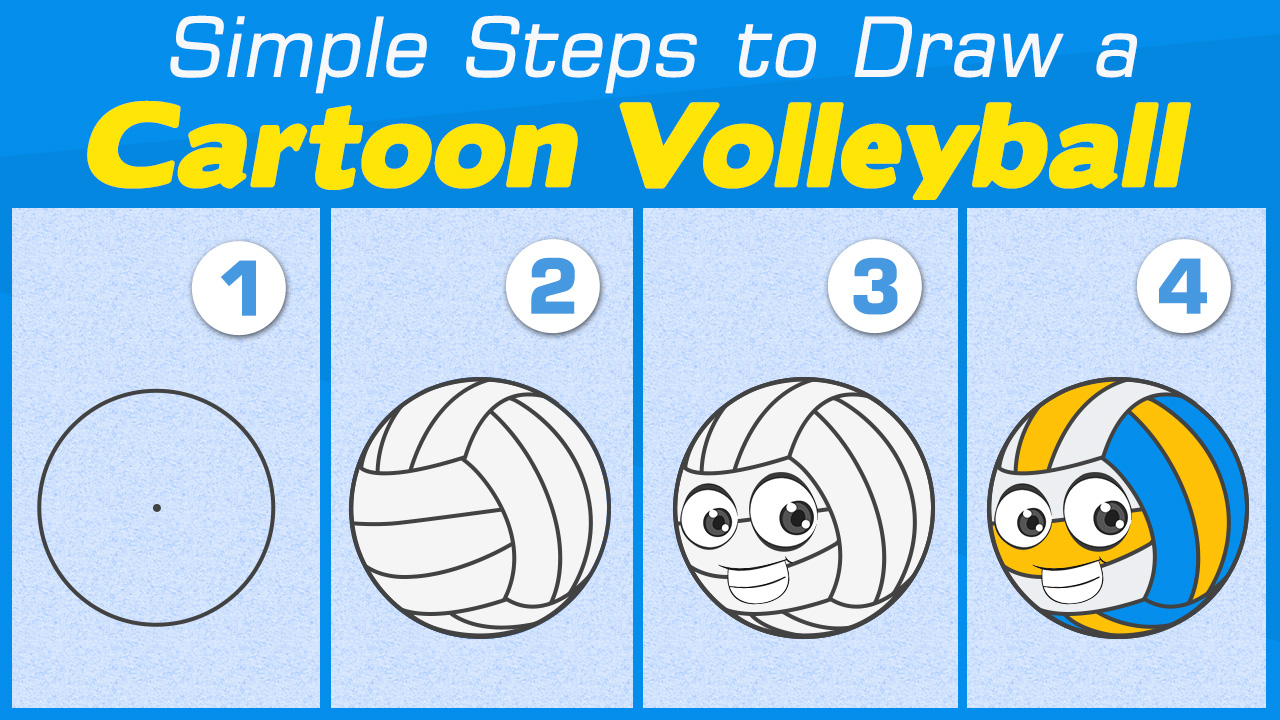
Cartoon Volleyball

Step 1: Draw a simple circle first.

Step 2: Make three sections as shown above.

Step 3: Draw two lines in each section. This completes your simple volleyball.

Step 4: Now, we start drawing the hands and legs for the volleyball.

Step 5: Do the detailing.

Step 6: It’s time to draw the eyes and a big smile on the volleyball. You can of course have any other expression as well.

Step 7: Do the detailing.

Step 8: Finally, color the ball, and your cartoon volleyball is ready.
Flaming Volleyball

Step 1: Draw a simple volleyball, referring to the first method.

Step 2: Now, draw a curved line on each side of the ball.

Step 3: Extend the lines to make flames.

Step 4: Join them to get the basic outline of a flame.

Step 5: Add more details like shown in the image. This will make your flame look more realistic.

Step 6: Start making sections inside the flame.

Step 7: Just keep on drawing inside the flame in the same shape of the basic outline.

Step 8: The sections should go on becoming smaller and smaller.

Step 9: We are done with the drawing part now.

Step 10: It’s time to color the flame for a fiery effect.

Your flaming volleyball is ready!
We hope that now you find drawing a volleyball much more easier after going through this tutorial. Just remember one thing, don’t think too much while drawing; practice a lot, and simply have fun!


