In order to express your feelings through the art of typographic design, many artists choose graffiti letters. Read the ArtHearty article to see how too can do so.
Disclaimer
While we support the artform known as graffiti, we do not condone any act or form of vandalism or any illegal activity relating to such whether it be to private, commercial, or public property.
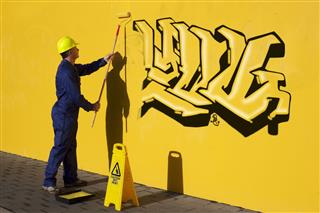
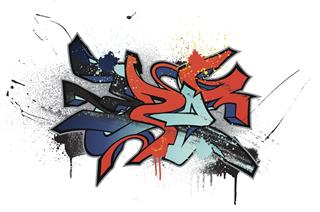
Many people don’t understand the concept of graffiti. They often miscalculate it as being vandalism (which I would agree to as well if done at an unauthorized location) and misjudge it. Graffiti is a form of art, often illegal when done on buildings you don’t own), where you can express your creativity and talents as an artist. There are no specific rules that need to be followed as the art is open for freedom of self-expression. So, before we begin on the actual “how to” part, here are some pointers you should remember about it.
- The alphabets typically overlap one another to make the illusion.
- The fonts are basically drawn in a 3D fashion.
- The entire picture is one big drawing which attracts attention.
How to Get Started
To improve and keep excelling in creating innovative designs and/or writings, all you have to do is keep your mind open for anything. This art finds inspiration from basically anything around us and you can incorporate that into your art.


Step 1: Understand the different types of letters and styles. If you live in an area where graffiti is not very common, then visit a city or downtown for inspiration. The more styles you come across, the more you can visualize the entire picture and characteristics.
Step 2: Get a piece of paper and write down some name, place, or any word for that matter. You can also start with your own name (it works best with beginners). By learning to write your own name can provide you with a unique signature for yourself. Take a pencil and print each letters in capital. Don’t press down too hard as you might have to erase a couple of times before perfecting it. Keep some space between each letters as the space will be utilized once you start filling them.
Step 3: You can choose any style of writing as you want. It can be bubble letters, sharp edged letters, rounded edges, equal sized letters, or mismatched letters. Start with one style, perfect it and then you can learn various shapes and sizes. As there are no rules, the possibilities are endless. Who knows, you might just create a unique style in the process.
Step 4: Once you’re done writing, you will make outline on each of the letters. This outline will depend on the type of style (bubble, sharp, round) you want to obtain. Mark the outline with the pencil and don’t press down too hard. Gently make almost visible lines. You might make some errors here, but that’s alright. It will definitely take some time and practice to get it right. As you’re drawing and outlining, there can be changes made in the middle as well (remember, no rules).
Step 5: The secret that enhances any writing are the lines and its proportions. Depending on how thick or thin they might be, you can create the illusion of a 3D art. Fill in the shades between each letters with the pencil just as you would in normal sketching. Then with a marker, you can darken the empty spaces which will look like shadows of each letter on the page.
Step 6: As each letters form their own designs with the pencil, you can start adding the details as you like. Take a light pencil and make the illusion part of your art. What I mean is, let’s say you have an “i” in the name you chose. You can draw a star, lightning bolt, or something else instead of the regular dot on the letter. Same goes for other letters as well. You can draw a bubble around the entire drawing or imitate the drawings from the comic books.
Step 7: After you finish the detailing on your drawing, make another copy. If, at any given point, you make a mistake that can’t be rectified, the backup drawing can save all your work. Make a couple of copies so you can fill them in with different colors. Take the original drawing now and darken the lines with the pencil or a marker. These lines will be permanent, but don’t let that discourage you. It’s perfectly fine to make mistakes. You can start over again with the copies. If the lines are too thick or too thin, you can just make the entire drawing in that way to look even.
Step 8: Now it’s time to add some vibrant colors to your drawing. You can use color pencils or markers to fill in the colors. However, before you begin, take a look at some color combination and ideas. Comic books can be of great help or you can click pictures of some graffiti that you find in the city. Mix and match colors on the letters or keep the entire word in one color, the possibilities are endless. Follow your imagination and you can create a unique drawing on your own.
The key to creating graffiti is to keep practicing. Try different words, color effects, shapes, and designs. You can carry a book with you and draw the letters as and when you desire.
